
Over time, car headlights can become foggy, yellowed, or scratched due to UV exposure, road debris, and oxidation. Restoring them improves visibility, safety, and the overall appearance of your vehicle. This guide covers everything you need to know about headlight restoration in South Africa.
Why Restore Your Headlights?
- Improved Night Visibility – Cloudy headlights reduce light output, making night driving dangerous.
- Enhanced Safety – Properly functioning headlights are crucial for seeing and being seen.
- Better Resale Value – Clear headlights make your car look well-maintained.
- Cost-Effective – Restoration is cheaper than buying new headlights.
Signs Your Headlights Need Restoration
- Yellowing or hazing (UV damage & oxidation)
- Foggy or cloudy appearance
- Scratches & surface damage
- Reduced brightness at night
Methods of Headlight Restoration
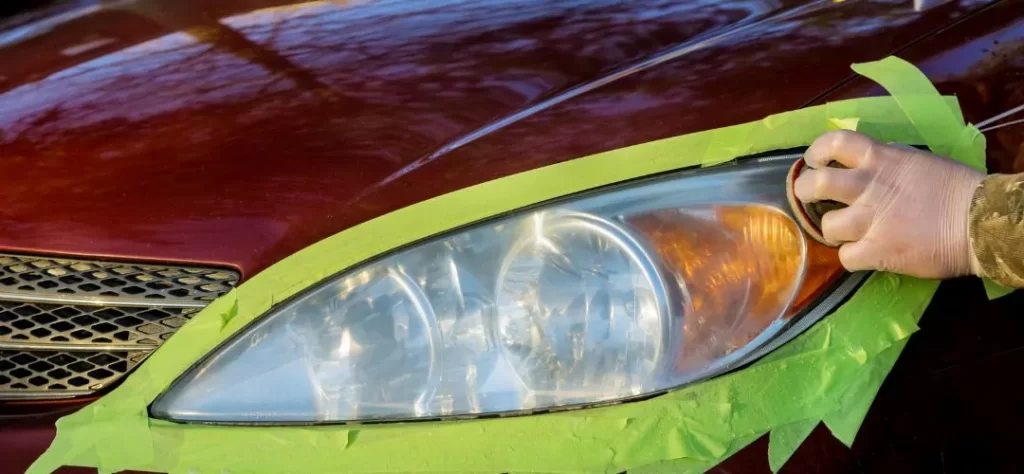
1. DIY Sanding & Polishing
Tools Needed: Sandpaper (400–3000 grit), water spray bottle, polishing compound, microfiber cloth, UV sealant.
Steps:
- Clean the headlight thoroughly.
- Wet-sand the lens in stages (start with coarser grit, finish with fine grit).
- Apply a plastic polish and buff with a cloth or polishing tool.
- Apply a UV sealant to protect the lens.
Pros: Effective and inexpensive.
Cons: Time-consuming, requires careful technique to avoid damage.
2. Restoration Kits
What They Include: Sandpaper, polish, buffing pads, UV sealant, and sometimes drill attachments.
Brands: 3M, Turtle Wax, Meguiar’s, Sylvania.
Steps: Follow the kit instructions (usually involving sanding, polishing, and sealing).
Pros: Convenient, all-in-one.
Cons: Cost varies; not all kits include a UV sealant (important for long-term results).
3. Toothpaste Method (Temporary Fix)
Tools Needed: Toothpaste (non-gel, with mild abrasives), cloth, water.
Steps:
- Apply toothpaste to the headlight lens.
- Rub in circular motions for a few minutes.
- Rinse and dry.
Pros: Very cheap and quick.
Cons: Results are short-lived and not as clear as professional methods.
4. Baking Soda & Vinegar (or Lemon)
Tools Needed: Baking soda mixed with vinegar or lemon juice, a soft cloth.
Steps:
- Make a paste.
- Apply to the lens and rub gently.
- Rinse and dry.
Pros: Natural, non-toxic option.
Cons: Limited effectiveness; mostly for mild haze.
5. Professional Restoration
Where: Auto detailing shops or mobile detailers.
Steps: Usually involves mechanical sanding and polishing with commercial-grade sealants.
Pros: High-quality, long-lasting results.
Cons: Cost, requires scheduling.
6. Headlight Lens Replacement
When to Use: If the lens is cracked, deeply pitted, or beyond repair.
Pros: Permanent solution.
Cons: Most expensive option.
Where to Get Headlight Restoration in South Africa
1. Auto Detailers & Workshops
- Supa Quick – Nationwide branches.
- Auto Armour – Professional detailing services.
- Bosch Car Service – Offers headlight restoration.
2. Mobile Services
Some companies offer mobile headlight restoration, where they come to you:
- Headlight Medic SA (Johannesburg & Pretoria)
- Revive Auto Detailing (Cape Town)
3. DIY Purchase Locations
- Takealot – Online kits available.
- Autozone / Midas / Mica – Physical stores nationwide.
How Long Does Headlight Restoration Last?
- DIY Kits: 6 months – 1 year (depending on UV exposure).
- Professional Restoration: 1–3 years (with proper sealant).
Preventing Future Headlight Damage
- Park in the shade – Reduces UV exposure.
- Apply a protective film – Clear vinyl protects against scratches.
- Regular cleaning – Prevents dirt buildup.
- Use car wax – Adds a protective layer.
Conclusion
Headlight restoration is an affordable way to improve your car’s safety and appearance. Whether you choose a DIY kit or professional service, Headlight Renewal has plenty of options to get your headlights looking like new again.
Also Read: Simplifying Workforce Management with Employer of Record Services