Using a photocopier machine doesn’t have to be a hectic issue. However, when you’re in a school, office, or running a business, then you should have an idea of how to operate photocopy machine. However, if you don’t know how to operate one, then it’s not a big problem.
You have to understand that there are different machines, and each machine has different functionality. That is the reason that I suggest reading the manual first. To make your life easier, we have created a general step-by-step guide for all the beginners who want to learn to operate a photocopy machine.
Step 1: Get to Know Your Photocopier
Before pressing any buttons, take a quick tour of the machine. Here’s what you’ll typically find:
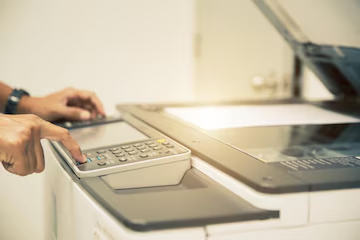
- Control Panel: This is the “brain” of the copier, where you adjust settings like the number of copies, darkness, and paper size. It usually has a digital display and buttons or a touchscreen.
- Document Feeder: If your copier has one, this handy feature lets you load multiple pages at once instead of placing each sheet manually.
- Flatbed Scanner: The glass surface where you place single pages, books, or odd-sized documents.
- Paper Trays: These hold blank paper in different sizes (letter, legal, A4). Some machines have multiple trays for different paper types.
- Output Tray: This is where your freshly printed copies land.
Step 2: Powering Up the Machine
Most copiers have a power button on the control panel or side. Press it, and you might hear a humming sound as the machine warms up. This can take a few seconds to a minute.
- If the copier doesn’t turn on, check that it’s plugged in.
- Some machines go into “sleep mode” to save energy. Just press the power button again to wake them up.
Step 3: Loading Your Document Correctly
There are two ways to load what you want to copy:
Option 1: Flatbed Scanner
- Lift the scanner lid.
- Place your document face-down on the glass.
- Align it with the corner guides (usually marked with arrows or lines).
- Close the lid gently. Slamming it can misalign the document.
Option 2: Automatic Document Feeder (ADF)
- Place your stack of papers face-up in the feeder tray.
- Adjust the side guides so they snugly fit the paper width (this prevents skewing or jams).
- Don’t overfill the tray. Most ADFs handle 10-50 sheets at once.
Step 4: Adjusting Your Copy Settings
Now for the fun part is customizing your copies! Here’s what you can tweak:
- Number of Copies: Need 10 copies of a report? Just type “10” on the keypad.
- Paper Size: Select the right size (e.g., letter for standard 8.5×11, legal for longer docs).
- Color vs. Black & White: Color copies cost more, so use them only when necessary.
- Darkness/Contrast: If the original is faint, increase darkness; if it’s too dark, lighten it.
- Zoom/Resize: Need a smaller or larger copy? Adjust the percentage (e.g., 70% for smaller, 120% for bigger).
- Double-Sided (Duplex) Copies: If your copier supports it, you can print on both sides of the paper automatically.
Step 5: Loading Paper
Running out of paper mid-job is annoying. Here’s how to prevent it:
- Open the paper tray.
- Add fresh paper, making sure it’s aligned neatly.
- Adjust the tray guides to fit the paper snugly (loose guides cause jams).
- Don’t mix paper types in the same tray. Just stick to one size and weight.
What If the Copier Jams?
- Follow the on-screen instructions (most modern copiers show where the jam is).
- Open the designated panel and gently pull out the crumpled paper.
- Avoid tearing the paper. Leftover bits can cause more jams.
Step 6: Press the Start Button!
Once everything’s set, hit the big green Start or Copy button. The machine will whirr to life, scanning and printing your documents.
- If using the ADF, listen for smooth paper feeding. Grinding noises mean a misfeed.
- For large jobs, the copier might pause between batches.
Step 7: Collecting Your Copies
Check the output tray:
- Are all the pages there?
- Is the text clear and aligned?
- If pages are missing, check the ADF for stuck originals.
If you’re copying double-sided originals and your copier doesn’t auto-flip them, you’ll need to manually re-feed pages for the back sides.
Step 8: Shutting Down (Or Not?)
- If it’s your copier, power it off to save energy.
- In a shared office? Leave it on. Frequent power cycling wears out the machine faster.
Troubleshooting Common Issues
- Paper Jams: Open the indicated panel and gently remove the stuck paper.
- Blurry Copies: Clean the scanner glass or check for smudges on the original.
- Streaks or Spots: The toner may be low or uneven; replace it if necessary.
Final Thoughts
Mastering a photocopy machine is easier than it seems. Just follow these steps, and you’ll be making perfect copies in no time. And if you’re looking for a high-quality, budget-friendly copier, TNT Copier Wholesale has you covered with top-notch machines and excellent customer service.
Need a reliable copier for your office? Contact TNT Copier Wholesale today at (813) 888-6400 or email [email protected] for the best deals on new and refurbished copiers!
Frequently Asked Questions(FAQS)
- How do I reduce paper jams?
Use good-quality paper, don’t overfill trays, and ensure guides are properly adjusted.
- Can I copy double-sided documents?
Yes! Select the Duplex option in settings if your copier supports it.
- Why are my copies coming out too dark or too light?
Adjust the darkness/contrast settings or clean the scanner glass.
- How often should I replace the toner?
When copies appear faded or streaky, it’s time for a new toner cartridge.
- What’s the difference between a copier and a multifunction printer?
A copier only copies, while an MFP can print, scan, and fax as well.


